- Introduction
There’s something primal and captivating about a crackling fire. Whether you’re planning a cozy evening indoors or a rustic outdoor gathering, mastering the art of firelighting is essential. One of the most effective tools in your fire-starting arsenal is the humble firelighter. In this guide, we’ll take you through everything you need to know about using firelighters to effortlessly ignite a roaring blaze.
Understanding Firelighters
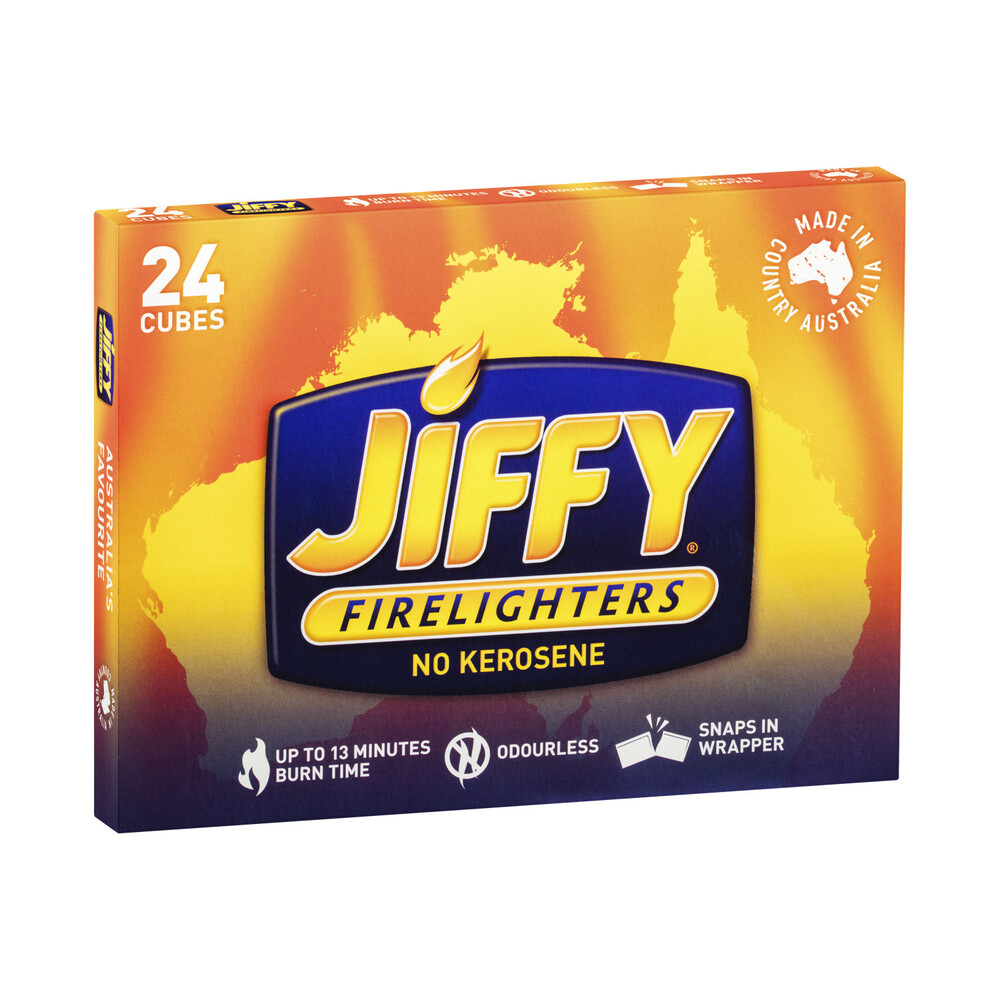
Firelighters are small, easily combustible products designed to help you start fires quickly and efficiently. They come in various forms, such as blocks, cubes, sticks, and even liquid or gel. These products are often made from a combination of paraffin wax, sawdust, paper, and other flammable materials.
Choosing the Right Firelighter
Before delving into the techniques, it’s important to select the right type of firelighter for your needs:
- Cubes or Blocks: These are easy to handle and ignite. They provide a steady flame for a longer period, making them great for starting larger fires.
- Liquid or Gel: Liquid firelighters are convenient for igniting charcoal in barbecues, while gels can be applied directly to logs. They’re effective and mess-free.
- Sticks: Firelighter sticks resemble oversized matches. They’re ideal for getting kindling and small pieces of wood to catch fire.
Safety First
Before you begin, ensure your safety by following these precautions:
- Ventilation: Always use firelighters in well-ventilated areas to prevent the buildup of harmful fumes.
- Distance from Flames: Keep your face and hands away from the flames while igniting the firelighter.
- Keep Children and Pets Away: Firelighters can be hazardous if mishandled. Always keep them out of reach of children and pets.
Step-by-Step Guide to Using Firelighters
- Prepare Your Fire Area: Clear the fire pit or fireplace of any debris, ash, or leftover wood. This provides a clean, efficient environment for your fire to ignite.
- Arrange Your Kindling: Place a bed of small, dry kindling in the center of your fire area. This will help create a base for your firelighter to catch fire and spread.
- Position the Firelighter: Depending on the type of firelighter you’re using, either place a cube or block directly on the kindling or insert a firelighter stick among the kindling. If using liquid or gel, apply a small amount to the kindling.
- Ignite the Firelighter: Light the firelighter using a long match or lighter. Ensure you ignite it from the recommended ignition point on the product.
- Wait for Ignition: Allow the firelighter to burn for a few moments until it creates a stable flame and begins to catch the kindling.
- Add Larger Wood: Once the kindling is burning steadily, gradually add larger pieces of wood while maintaining proper air circulation. This will ensure your fire continues to grow.
- Monitor and Adjust: Keep an eye on your fire’s progress and adjust the airflow as needed to maintain a steady burn. Remember, fires require oxygen to thrive.
Tips for Success
- Use Dry Materials: Moisture can hinder the ignition process. Ensure your kindling and firelighters are completely dry before starting.
- Avoid Overloading: Using too many firelighters can create an overly intense flame that consumes the wood too quickly. Start with the recommended amount and adjust as needed.
- Patience is Key: Don’t rush the process. Give your fire enough time to establish itself before adding larger logs.
- Use a Windbreak: If you’re outdoors, consider using a windbreak to shield your fire from gusts that might extinguish the flame.
Conclusion
Mastering the art of firelighters elevates your fire-starting skills and enhances the enjoyment of gathering around a warm and inviting fire. By selecting the right type of firelighter, following safety precautions, and following a step-by-step approach, you can confidently start fires for any occasion – whether it’s a cozy night indoors or an exciting outdoor adventure. Remember, practice makes perfect, so don’t hesitate to refine your technique and enjoy the magic of a well-lit fire.
ary Tools: Before diving into the cleaning process, gather the following tools to make the job easier and more efficient:
- Gloves
- Safety goggles
- Dust mask
- Drop cloth or old sheets
- Stiff-bristle brush
- Metal ash shovel
- Metal bucket
- Vacuum cleaner with a HEPA filter (optional)
- Chimney brush and rod (for chimney cleaning, if necessary)
- Prepare the Area: Cleaning your fireplace can be a messy task, so it’s important to protect the surrounding area. Place a drop cloth or old sheets around the fireplace to catch any debris or soot that may fall during the cleaning process. Additionally, ensure that the fireplace is completely cool before you begin cleaning to prevent any accidental burns.
- Remove Ashes and Debris: Start by removing the bulk of the ashes and debris from the fireplace. Using a metal ash shovel, carefully scoop out the cooled ashes and place them in a metal bucket. Be cautious not to scatter the ashes around the room, as they can be difficult to clean up. Dispose of the ashes in a safe manner, such as in a designated ash container or an outdoor compost pile.
- Clean the Fireplace Interior: Next, using a stiff-bristle brush or a vacuum cleaner with a HEPA filter attachment, clean the interior walls and floor of the fireplace. Gently scrub the surfaces to loosen any remaining soot or residue. If using a vacuum, ensure it has a filter capable of trapping fine particles to prevent them from being released back into the air.
- Clean the Fireplace Grate and Accessories: If your fireplace has a grate or other accessories, remove them and clean them separately. Use the stiff-bristle brush to scrub away any built-up soot or debris. Rinse them with water and allow them to dry completely before putting them back in the fireplace.
- Address Creosote Buildup (Chimney Cleaning): Creosote is a highly flammable substance that can accumulate inside the chimney over time, posing a fire hazard. If you regularly use your fireplace, it’s essential to have the chimney professionally inspected and cleaned at least once a year. A professional chimney sweep will use specialized tools, such as a chimney brush and rods, to remove creosote and ensure your chimney is clear of any obstructions.
- Safety Precautions: Throughout the cleaning process, ensure you follow these safety precautions:
- Wear gloves, safety goggles, and a dust mask to protect yourself from ash, soot, and dust particles.
- Keep the area well-ventilated by opening windows or using fans to prevent the buildup of dust and fumes.
- Avoid using any water or liquid cleaning solutions inside the fireplace, as this can cause damage or create a sticky residue.
Regularly cleaning your fireplace not only enhances its visual appeal but also ensures its safe and efficient operation. By following the steps outlined in this guide, you can maintain a clean fireplace and minimize the risk of potential hazards associated with neglect. Remember, when in doubt or for more complex cleaning tasks, it’s always advisable to seek professional assistance to ensure the longevity and safety of your fireplace. Stay warm, cozy, and safe!
